miércoles, 2 de abril de 2014

LEMON POWER

Project to Make a Battery From a Lemon
  1. 18-gauge copper wire (smaller gauge will work too, but 18-gauge is stiffer)
  2. Wire clippers
  3. Steel paper clip (Some people find that a 2-inch strip of zinc works better)
  4. Sheet of coarse sandpaper
  5. Lemon
  6. Help from an older friend or an adult

Have your older friend or an adult strip 2 inches of insulation off the copper wire. Clip the 2 inches of bare wire with the clippers.
Straighten out the paper clip and cut about 2 inches of the straightened steel wire, or use a 2-inch piece or strip of zinc.
Use sandpaper to smooth any rough spots on the ends of the wire and paper clip or piece of zinc.
Squeeze the lemon gently with your hands. But don't rupture the lemon's skin. Rolling it on a table with a little pressure works great.
Push the pieces of the paper clip and the wire into the lemon so they are as close together as you can get them without touching.
Moisten your tongue with saliva. Touch the tip of your wet tongue to the free ends of the two wires.

You should be able to feel a slight tingle on the tip of your tongue and taste something metallic.


The lemon battery is called a voltaic battery, which changes chemical energy into electrical energy.

The battery is made up of two different metals (the steel paper clip and the copper wire). These are called electrodes, which are the parts of a battery where electric current enters or leaves the battery. The electrodes are placed in a liquid containing an electrolyte, which is a solution that can conduct electricity.

In a solution of water and an electrolyte, like the acid in the lemon, an excess of electrons collects on one end of the electrodes. At the same time, electrons are lost from the other electrode.

Touching the electrodes to your tongue closes the circuit and allows an small electric current to flow. A single lemon produces about 7/10 of a volt of electricity. If you connected two lemons together, you can power an inexpensive digital watch (uses about 1.5 volts). (Use a length of thin, flexible wire to connect the silver wire of one lemon to the copper wire of the other lemon. Then attach thin wires from the other two wires in the lemons to where a battery's positive and negative poles connect to power the watch.)

The tingle felt in your tongue and the metallic taste is due to the movement of electrons through the saliva on your tongue.

                                                              WATCH THE VIDEO HERE

NON NEWTONIAN FLUID

Picture of How To: Make Non-Newtonian Fluid (& Experiment with it!)


Our matter will turn into a solid when pressure is exerted on it, and will turn into a liquid when little or no pressure is exerted on it.

"It's not that this fluid doesn't have a well defined viscosity (because we can mathematically define the fluid viscosity) -- it's that this fluid's viscosity is defined as a function of the rate of shear - that is, the fluid acts more viscous as you increase shear - a dilatant fluid"

Materials needed for this experiment:
~Corn Starch (About as much water as you are using)
~Water
~Containers
~Stirring rod (or anything to stir with)
~Ice
~Freezer
~Microwave

Paso 1: Mix it!

Put water in a big bowl/container you adding corn starch until the water becomes extremely tough to stir. It has also been described as a syrupy texture, but you should be able to feel a difference. If you are not sure, you can test it by applying pressure with the poke of your finger or a spoon. You will feel and initial resistance by the fluid and then it will slowly release.

Paso 2: The Fluid Itself

You will notice if you leave the fluid unattended for a spell, it will separate into two parts and solid will be on the bottom of the container. Simply mix it up once again to regain the non-Newtonian fluid texture.

As you poke and prod at the mixture, you can see and feel (if you use your hands) the mixture turning solid into liquid or vice versa. Get hands on! The texture is great to feel and will keep you occupied for hours on end!

After messing around for a bit, add more corn starch. This results in a more solidified liquid and you can better feel the reactions. 

martes, 1 de abril de 2014

RUN AWAY PEPPER


This is what you will need:

- a bowl of water
- pepper / glitter
- dish detergent.

Procedures:
 Sprinkle the pepper over the surface of the water. The glitter will float due to the water's surface tension. Dip your finger into dish detergent, then put it into the middle of the glitter and WHOOSH!!!! the glitter goes flying to the sides of the bowl creating a huge clear area in the center!

-Why is the glitter floating and not sinking? (Water is made of molecules that "hold hands" - these molecules create something called surface tension - things will float on water as long as that surface tension is not broken.)
-Why does the glitter  run to the sides of the bowl when we put a soapy finger in the middle? (Soap breaks the surface tension of water. The water molecules run away from the soap, carrying the glitter with them!)
-Why won't this experiment work if we add too much glitter? (There is no where for the water & glitter to move to, we created a glitter traffic jam!)
-What are some other ways we can change up the experiment? (See if hot water works, seltzer, oregano, the possibilities are endless!)

WATCH THE VIDEO HERE

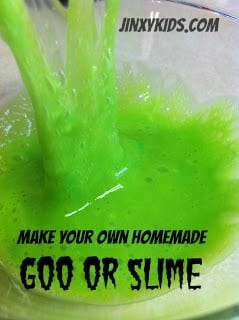
GOO OR SLIME


Here's what you'll need:
1 1/2 cups water
1 tsp borax
4 oz. glue (clear glue works best)
Food colouring (optional)
Glitter (optional)

Mix the borax into 1 cup of water
In a bowl, combine 1/2 cup water, the glue, 2 or 3 drops of food colouring, and glitter. Stir well.

Add the borax mixture into your bowl and stir. You will see the goo start to harden right away. Mix with your hands and set aside for a couple of minutes to dry to a rubbery consistency. You can discard the remaining water in the bowl.

Your goo will last for up to two weeks if kept in a tightly sealed bag


WATCH THE VIDEO HERE

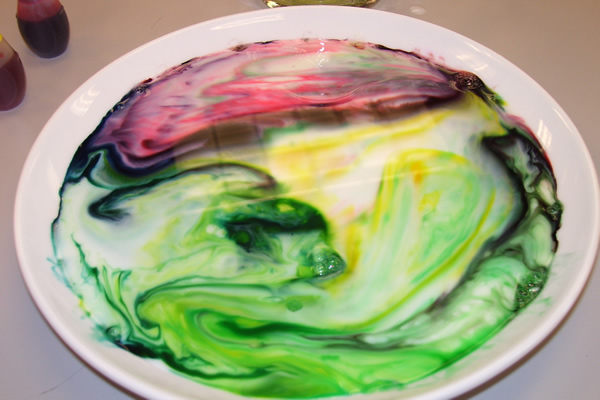
TIE DYE MILK


Here's What You'll Need:
A shallow dish
Whole Milk or Half & Half Cream
Food Colouring
Dish Soap
Q-Tips

Pour some whole milk into the dish.
Put a few drops of food colouring into the milk.
Dip one end of the Q-tip into the dish soap and then dip it into the milk.
Watch the tie-dye action!!!!

How it works:
The dish soap breaks the surface tension of the milk, sending the food colouring swirling!
The dish soap also works to break down fat in the milk (just like it works to break down grease on your dirty dishes). During this process, the food colouring molecules are bumped and pushed around the dish.

WATCH THE VIDEO HERE

BALLOON BLOW UP


Can you blow up a balloon with a chemical reaction? 

Here's what you'll need:
A clear plastic bottle
Vinegar
2 tablespoons of baking soda
A large balloon
Funnel (s)

Fill your bottle halfway with vinegar.
Using a funnel, pour the baking soda into the balloon.
Fit the balloon over the mouth of the bottle and then lift the balloon up so that the baking soda falls into the bottle.

How it happens:

Watch as the balloon fills with the carbon dioxide that is produced when the baking soda reacts with the vinegar.

WATCH THE VIDEO HERE

LAVA LAMP


Here's what you'll need:
1.A clear bottle
2.Water
3.Vegetable Oil
4.Food Colouring
5.Alka Seltzer
6.A funnel (optional)

First fill your bottle 1/4 of the way full with water.
Next add vegetable oil using a funnel to fill the bottle.
Add some food colouring (watch as it sinks down into the water).
Finally add a few pieces of alka seltzer that have been broken up.
Voila - your very own lava lamp!!!

Try with different coloured food colouring and add more or less alka seltzer for varied effects. You can even put a lid on your bottle for use another day!

How it works:
When you add alka seltzer, the carbon dioxide that is produced rises to the surface bringing water and food colouring along with it. When the carbon dioxide is released at the top of the bottle, the water and food colouring sink back down because it is more dense than the oil.

                                                        WATCH THE VIDEO HERE